What is the best thing about Android? If you ask me, it is definitely the countless number of possibilities to customize your device to suit your liking. Windows and iOS have a lot of limitations, but that is not the case with Android. They sort of promote the ability to customize each and every aspect of the phone like the background, ringtones, launchers, apps and more. So, in this article, I’ll be going through each and every step that you’d need to follow to set up your very own custom ringtones on your Android smartphone. Even though I’ll be doing it on my Honor 4X, the same approach is applicable to almost any Android phone.
First, we’ll set up a custom dialler ringtone. There are three ways to do this and all the three are pretty easy. The first way is to do it through the Settings menu. The second way is to do it through a File Manager. The last approach is to use third-party apps, which offer a lot of custom features.
This is as easy as it can get. If you have a ringtone in mind and want to let the world know about it, simply open up the settings menu. Scroll down till you see the Sound option.
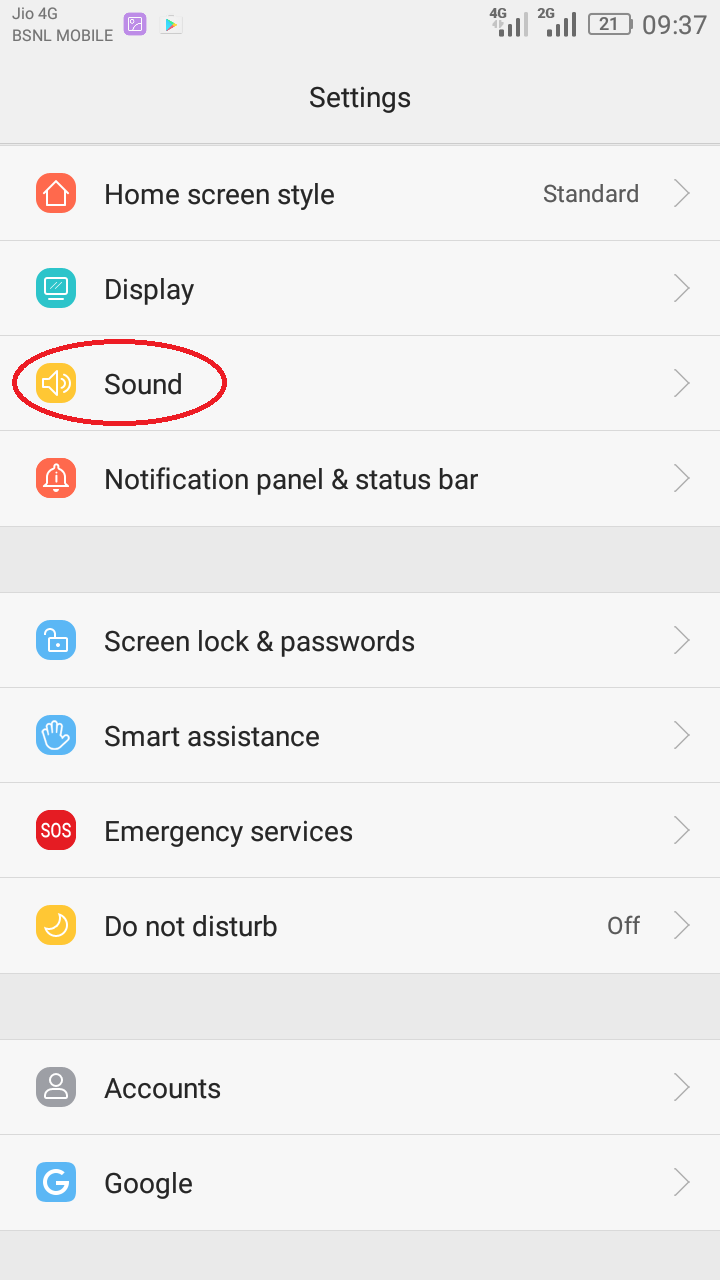
Depending on your phone’s make and model, this option might be under a different name. Select it and a host of options will appear before you. Don’t be intimidated, it’s all under control. Take some time to go through the different options and once everything has sunk in, click on the SIM 1 phone ringtone or SIM 2 phone ringtone, depending on the SIM that you use.
Once you click on that option, a new screen will pop out with two tabs. One with the ringtones that came along with the phone and the other with all the music that you have on your phone. Since we’re setting up a custom ringtone, we’ll choose the Music tab.
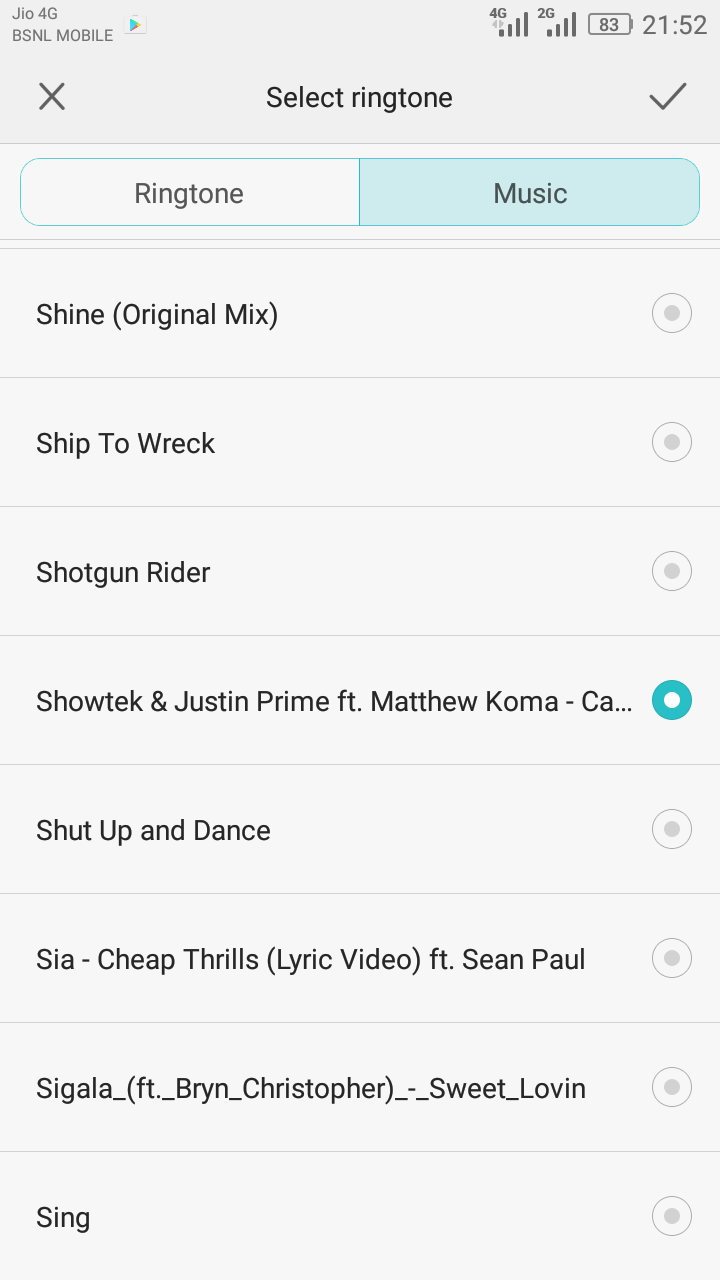
Once there, the job is almost done. All you have to do now is select the track you had in mind, preview it and press the ‘tick’ mark on the top right corner. Congratulations, you have set up your very own custom ringtone.
If you want to change the default notification ringtone, you can do that too. Just scroll down till you see the Notification Ringtone option and follow the exact same procedure mentioned above. To summarize everything we’ve just done, take a look below.
Settings > Sound > SIM 1 Phone Ringtone > Music Tab > Select the track > Press the Tick
The second approach is very similar to the first one. Instead of opening up the Settings menu, open up the File Manager. I have the default File Manager that came with the phone, but third party file managers work exactly like this. After selecting the File Manager, browse through to where you’ve stored all the music. I have it on the SD card, inside a folder named ‘Songs’. Once you’re there, select the track of your choice and perform a long press on it to open up a set of options.

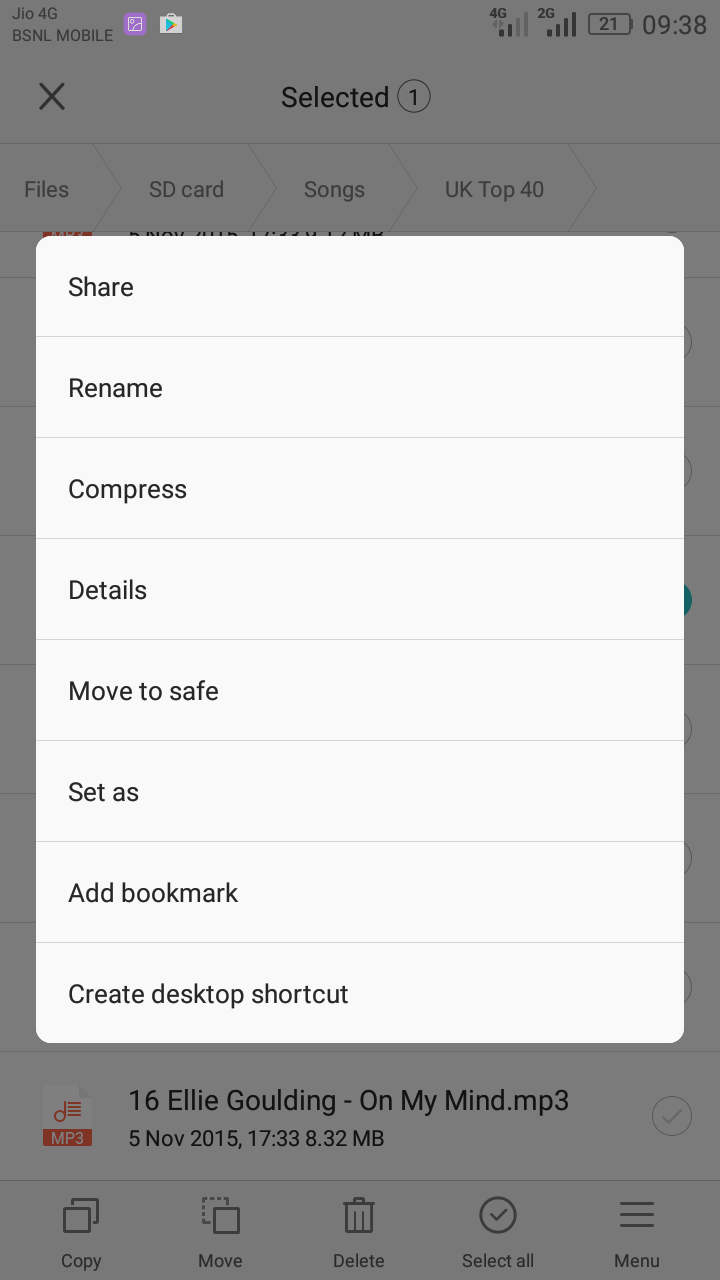

There you have the option to set it as your SIM 1 Phone Ringtone, SIM 2 Phone Ringtone or Notification Ringtone. Depending on what you wish to change, select the corresponding option and voila, you’re done!
You might want to set custom ringtones for specific contacts depending on the person that is calling. If it is your girlfriend, mom or dad, you wouldn’t want to miss it. If it is one of your friends, you wouldn’t want to keep them waiting. So, it is extremely important to set custom ringtones for certain contacts. Android has the provision to do exactly this and it is all built into the system.
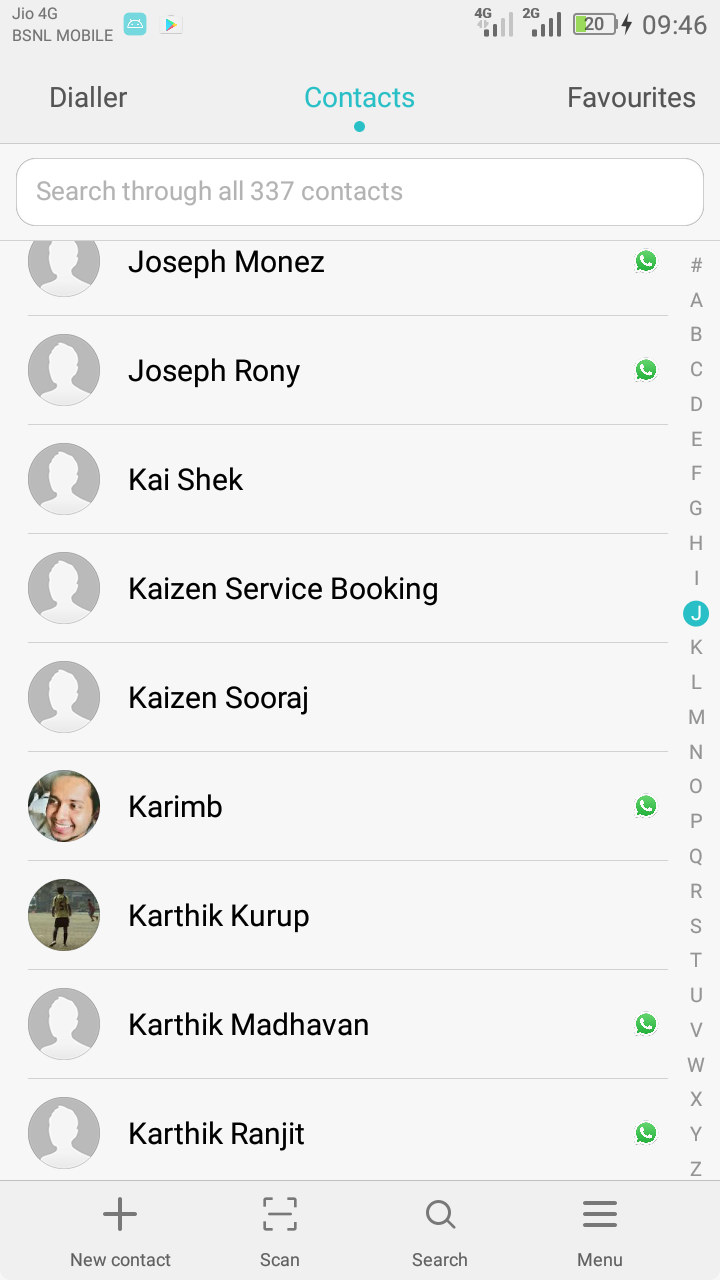
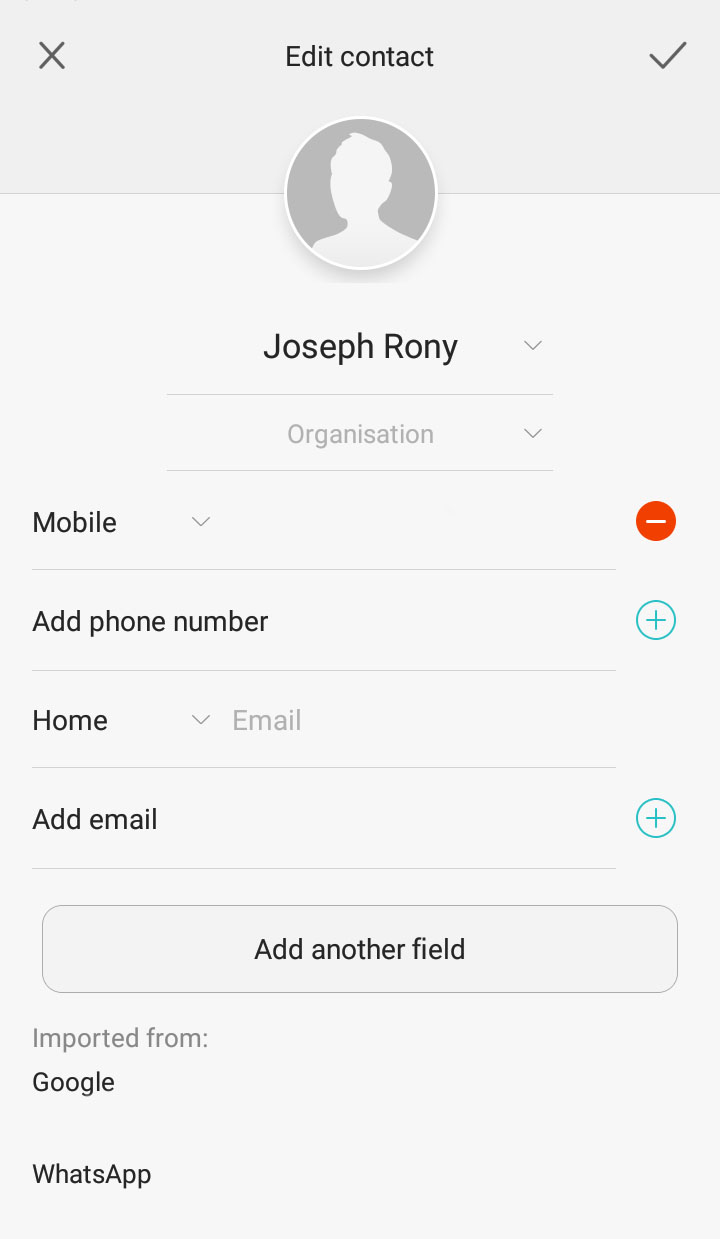
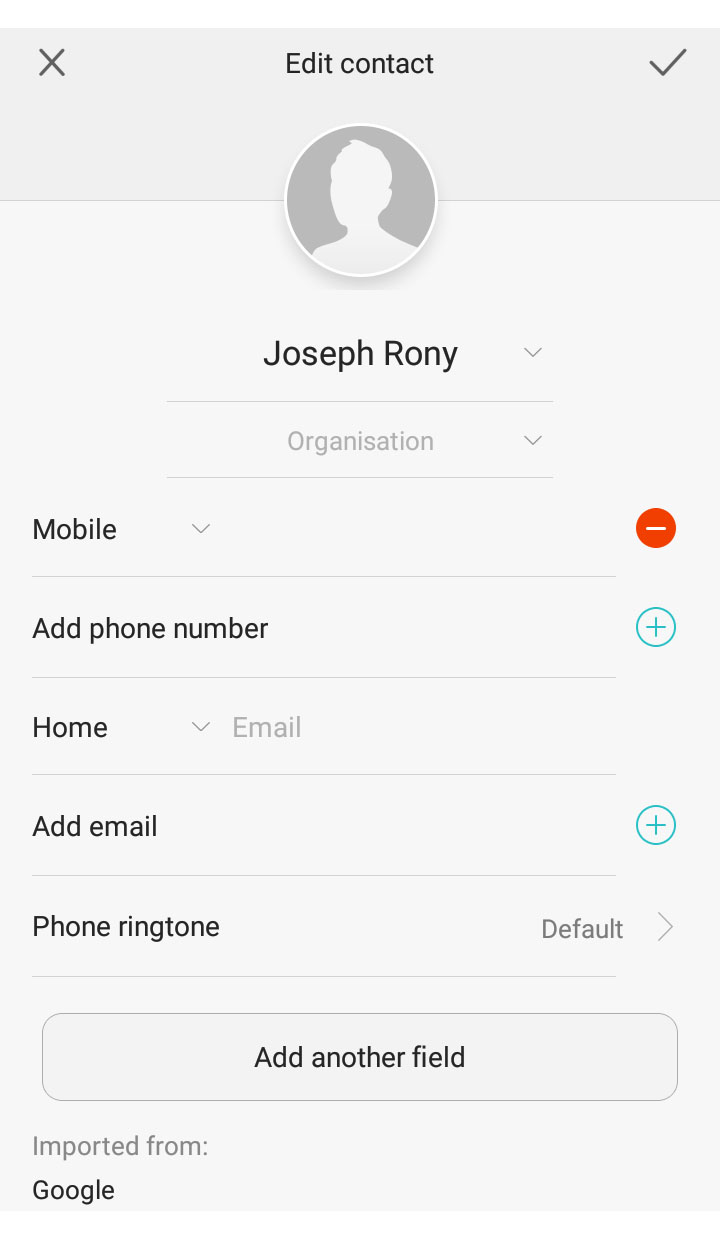
Open up your contacts menu and long press on the contact of your choice. Then select the edit option and you will be greeted with a new screen containing all their details. If there is no option for adding a Ringtone, select the option to ‘Add another Field’. After doing that, select the ‘Phone Ringtone’ option. Then it is the same procedure all over again. Select the music tab, select the track of your choice and press the tick mark to save changes.
Contact > Select the Contact > Long Press and select Edit > Add another field > Phone Ringtone > Music Tab > Select the track > Press the Tick`
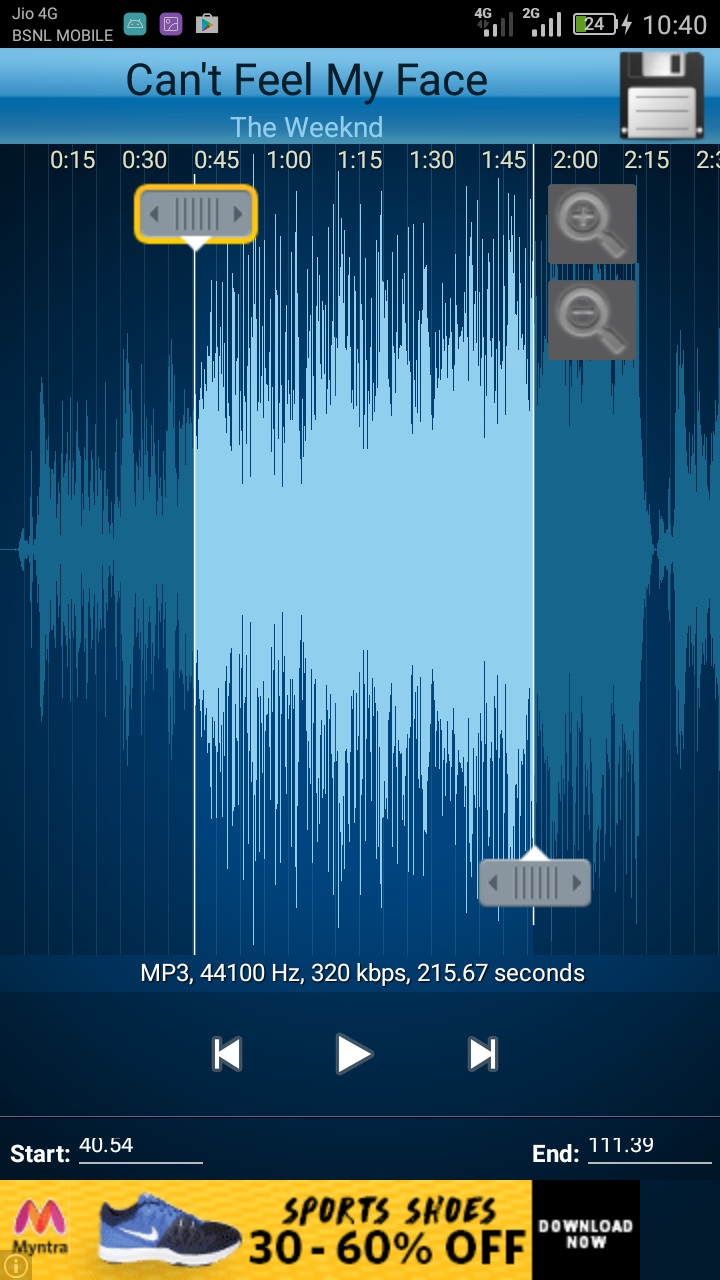
If you don’t want to go the steps given above, you can also use third party apps found on the PlayStore. They give a lot of freedom to choose the ringtone, edit its length and even loop or add effects. So, here is my pick of the best three apps on the PlayStore to set custom ringtones.
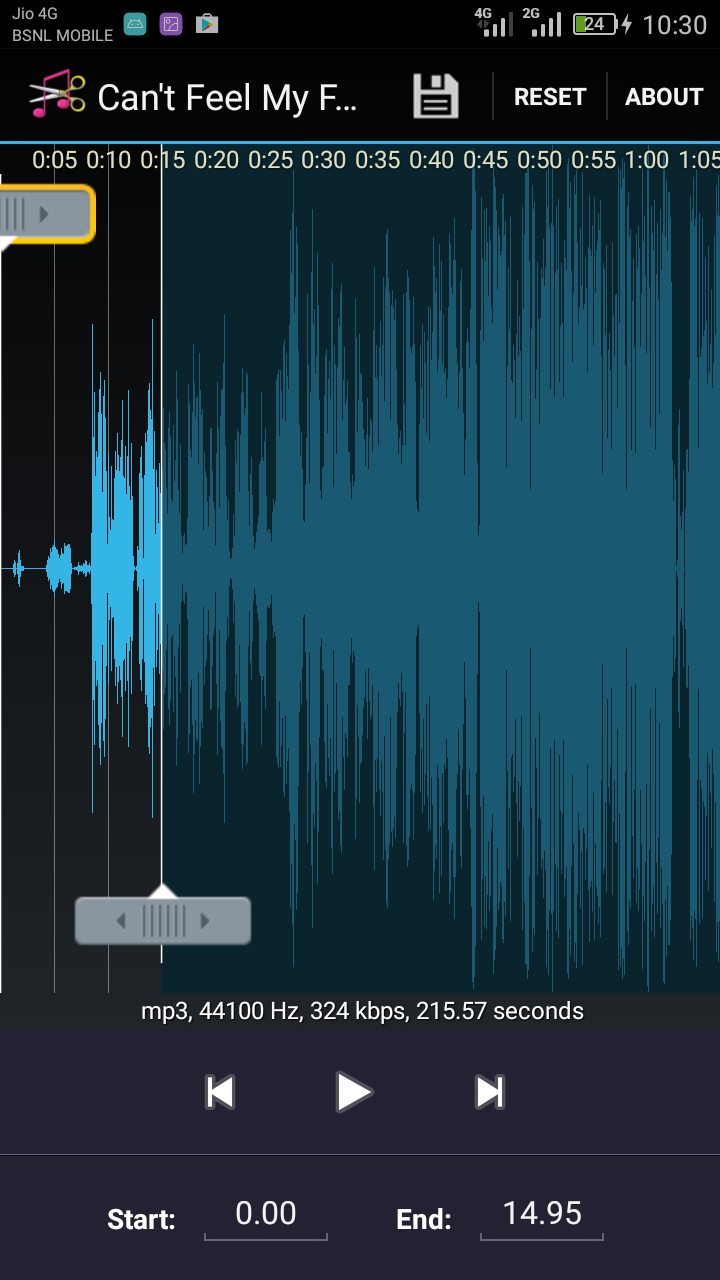
Ringdroid is a fascinating app. Apart from its really cool name, another thing that stands out is that it is completely open-source. It is one of the first ringtone/notification/alarm editors for Android and the numbers prove why it is so popular. Ringdroid allows users to create ringtones from existing music on their phone or record new ones with the inbuilt recorder. It needs access to your contacts, but only for setting contact specific ringtones.
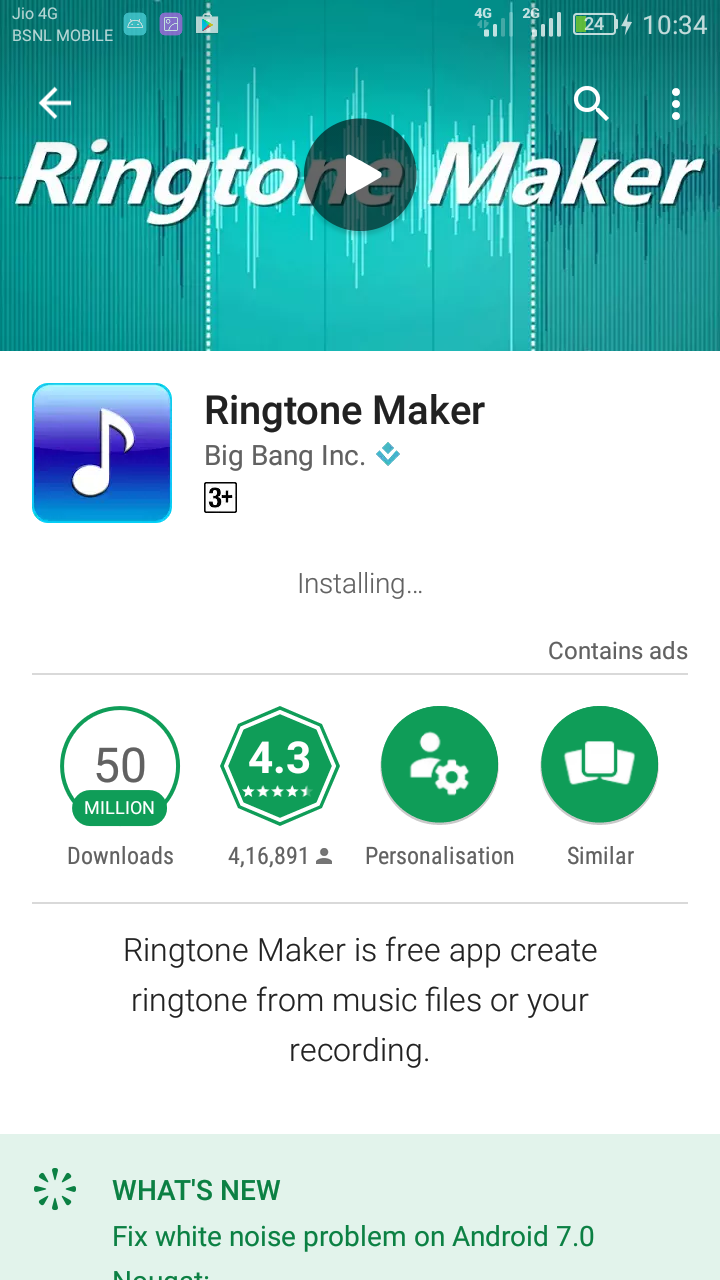
Ringtone Maker is extremely popular on the PlayStore and is from the Top Developer Big Bang Inc. It has over 50,000,000 downloads and over 400,000 ratings. This app allows users to create ringtones, alarms, and notifications from a wide range of file formats like MP3, OGG, FLAC, AMR, and more.
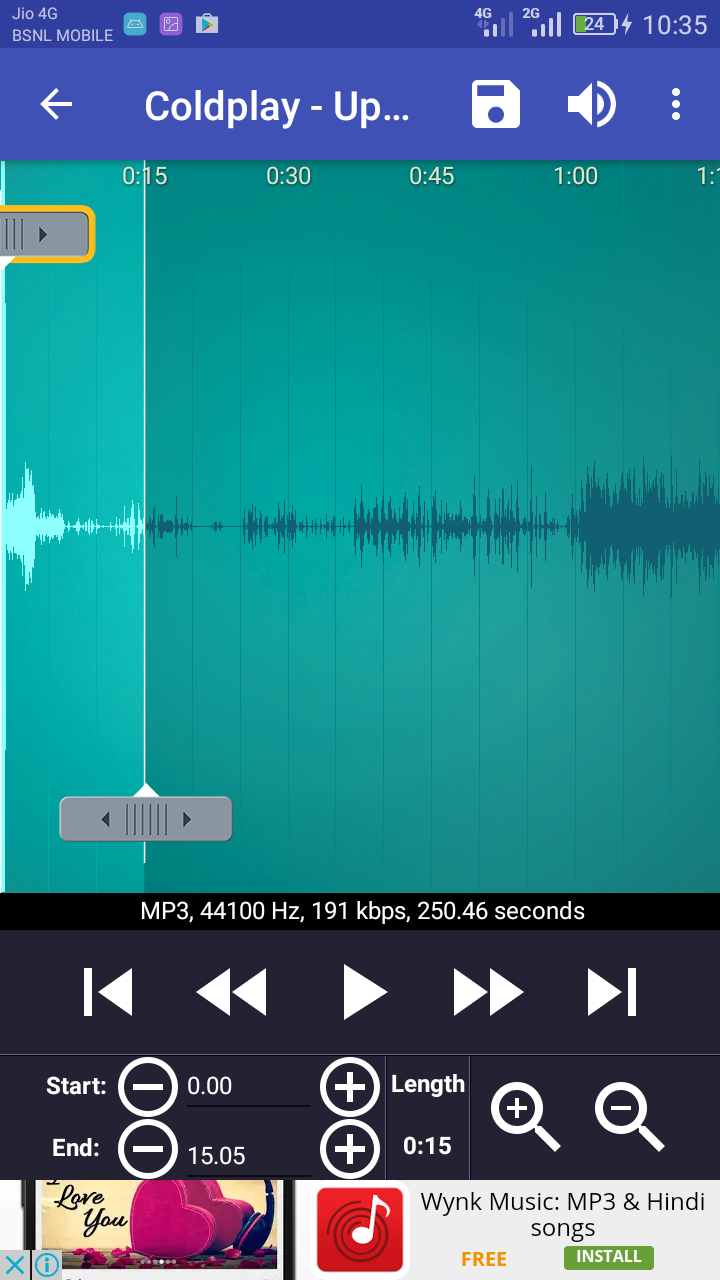
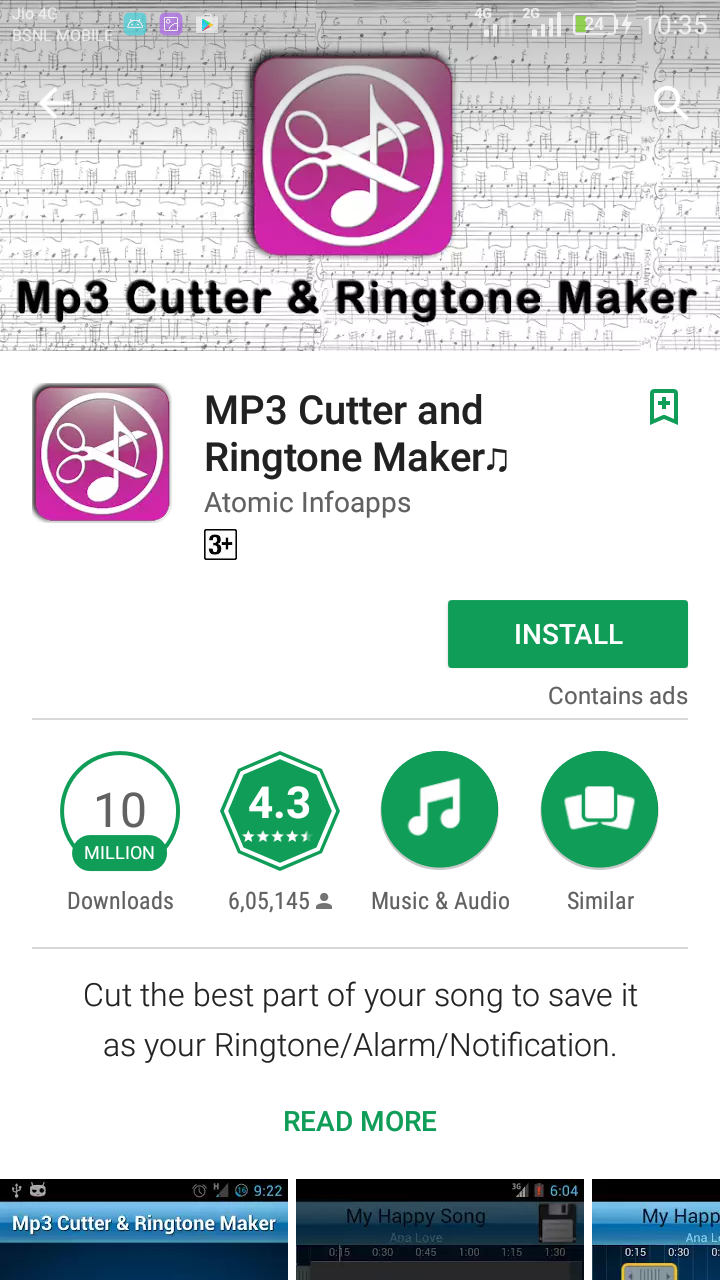
MP3 Cutter and Ringtone Maker♫ is yet another for setting and creating custom ringtones on the PlayStore. It has over 600,000 ratings and over 10,000,000 downloads. The simple interface and the fresh features have made it so popular. You can choose a track, cut it and set it as your alarm, notification or dialler tone.
All articles