Due to restrictions put in place by Apple, ringtones for iPhone are generally limited to those that you purchase specifically from iTunes, but with a bit of work, it’s possible to create custom ringtones from songs you already own by following our 10-easy steps. It may seem fiddly at first, but once you’ve made your first one it should be child’s play to make more custom ringtones in iTunes and transfer them to your iPhone and you’ll be annoying people in no time!
Note that these instructions are written for the current version of iTunes (12.6) and iOS (10) but they should be applicable to, both older and newer versions – it’s possible that it’ll look a little different, but the process itself will be unchanged.
Step 1: Choose a song to use. We can’t help you with this one (we have terrible taste in music as the screenshots will attest to) but remember that it needs to be something that’ll catch your attention, so a gentle ballad probably isn’t much good.
Step 2: There’s a length limit of 40 seconds for ringtones regardless of whether they’re purchased or custom made. So it’s unlikely you’ll be able to use a whole song. This means you’ll need to find an appropriate section to use, so listen to your tune of choice and make a note of roughly where you’d like it to start and end. This can be tweaked to your liking before committing yourself, so you don’t need to be too precise here, but the closer you can get it the better.
Step 3: Once you have a rough idea where you’d like the custom iPhone ringtone to start and end, right-click on the song in iTunes, pick Get info, then go to the Options tab. Enter your start and end points in the boxes, click OK, give it a listen, then fine tune it if you need to – you can use fractions of a second to get it spot on so how much time you want to spend tweaking is up to you.

Step 4: Once you’re happy with the excerpt, make sure the song is still selected, go to the File menu and select Convert > Create AAC version. This will add a new version of the song to your iTunes library that consists of just the portion you wanted – double check it’s OK, and if not delete it and do a bit more fine-tuning. (If you don’t have the Create AAC version option available, see the notes at the end of the tutorial for possible explanations.)
Step 5: Right-click on the shorter version of the song and choose “Show in Windows Explorer” in Windows, or “Reveal in Finder” in macOS.
Step 6: Change the file extension of the highlighted file from .m4a to .m4r – you may get a warning popping up when you do it, but don’t worry about it. If you can’t see the file extension you’ll need to change your Explorer or Finder settings; you can always change them back afterward.
For Windows:
Start Windows Explorer; you can do this by opening up any folder.
Go to the Organize menu and select Folder and search options.
Click the View tab.
Scroll down to Hide extensions for known file types and untick the box.
Click OK.
OS X/macOS:
Click on the desktop or open a Finder window.
From the Finder menu select Preferences.
Click on the Advanced tab.
Tick Show all filename extensions.
Close the window.
Step 7: Add the renamed file to iTunes. You can either do this by copying it to your Automatically add to iTunes folder, selecting Add File to Library… from the File menu in iTunes, or dragging the file into the iTunes window.
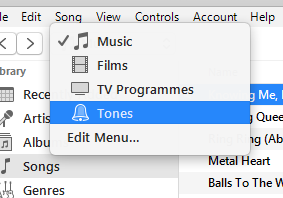
Step 8: Check your Tones library in iTunes to make sure it’s all worked correctly, then go back to the Songs library and delete the short version from there as it’s no longer needed.
Step 9: Remove the start and end points from the original song otherwise next time you listen to it you’ll only get a small portion. (And you may think your phone is ringing!)
Step 10: Sync your iPhone then go to Settings > Sounds > Ringtone and choose your creation.
Important things to note:
If your song is already in AAC format (songs purchased from iTunes will be AAC, and songs imported from CD may also be AAC depending on your settings), you’ll need to create an MP3 version of it before you can do step 4.
If the song is protected by DRM (which, if you purchased it before 2009, is likely) you have a couple of options: you can either repurchase the song, burn it to CD and reimport it as an MP3 or use an iTunes Match subscription to obtain a DRM-free version.
All articles